Ok, this blog post has a really specific title, but I’m sure a lot of it generalises to other devices and other software. 😅
I bought a stereo system recently! I don’t own any physical music media anymore – I left all my CDs behind when I moved to Germany seven years ago, and mostly just use Spotify now. So I needed a way to get Spotify on the stereo.
There are amps that support streaming services, but I didn’t want an all-in-one solution – the HiFi scene is one of the last places where everything is modular and (relatively) repairable, and I like that about it. Amplifiers feel much less temporal than streaming services (I’m pretty sure my Dad’s got an amp that’s older than me!), and my long-term plan anyway is to eventually finish this Raspberry Pi-powered floppy disk Spotify player and have that as the primary interface for the speakers.
I ended up with a Dayton Audio HTA100, which doesn’t support Spotify streaming. But it does support:
Bluetooth: I could stream Spotify from my phone over Bluetooth, but Bluetooth is fiddly and annoying, and there’s some mysterious source of 2.4GHz radiation in my apartment that causes audio dropouts.
Aux cable: I could take the Raspberry Pi from that floppy disk project, install librespot so that it works as a Spotify Connect client, and connect it via aux cable to the amp. But the 3.5mm audio out on the old Raspberry Pi 3 that I’ve got always sounded kinda garbage to me1 and so that doesn’t seem like a great idea.
- USB Audio: the HTA100’s got a USB port, and can act as a USB soundcard! Maybe I can connect it to the Raspberry Pi using that?

I like that it glows
The more I got thinking about the USB Audio approach, the more I liked the idea.
What makes it complex?
The thing that makes it hard is: the amp only appears on USB if you’ve explicitly chosen USB-Audio as the audio source by pressing a physical button. Once you switch the amp off or switch it over to a different input, the Raspberry Pi notices that the USB-Audio has gone missing, and switches back to using a different audio output.
I wanted to ensure that we’re only ever playing music to the USB Audio output. And the spotify server program I’m using will crash if that output channel isn’t available.
This means that the Raspberry Pi needs to:
- Detect when the USB Audio interface is connected and start the Spotify Connect service
- Detect when the USB Audio interface is disconnected / off and shutdown the Spotify Connect service.
But! Having Spotify on / off based on the amplifier state has some nice properties! It means:
the current track / podcast pauses the moment the amp switches off, so that I can pick it up again in the same place later.
if the amp isn’t switched to the USB source, it’s not available as a Spotify target at all, and so I won’t end up in situations where (hours later) my phone is still trying to play using the amp even though I’m in a different room trying to play audio via a different speaker.
When I eventually reintroduce that scrolling LED display from the aforementioned floppy-disk prototype, I can have the display switch off automatically when the amp’s using a different audio source.
So the technical problem is then: how do we start running a program on the Raspberry Pi when the USB device is connected? And keep running it until the USB device is disconnected?
Introducing udev + systemd
We’re going to use two pieces of pretty fundamental Linux systems software to get this set up:
udevis a system for programmatically executing rules when devices connected to the system change2. We’ll use this for noticing when the USB sound card is connected / disconnected.systemdis a system for keeping all the background processes running on a Linux machine.
These tools are both really powerful, but also pretty tricky to configure correctly, so the general approach we’ll take today is to get each piece running individually, and then tie them all together at the end.
Step 0: Figure out which software we want to run on device connection
I spent a bunch of time playing around with librespot, and was pretty happy with using it for Spotify Connect. It’s got command-line options to (among other things) always send output to a specific sound-card, which I ended up using in my config. Note that you’ll need to compile / install it via crates.io.
Step 1: Create a systemd service
I used the docs for spotifyd for a template for how to do this, but essentially:
Create a file named
~/.config/systemd/user/librespot.service.Add the following content to it:
[Unit]
Description=Spotify Connect
Documentation=https://github.com/librespot/librespot
Wants=sound.target
After=sound.target
Wants=network-online.target
After=network-online.target
[Service]
# this is the command that we chose in Step 0
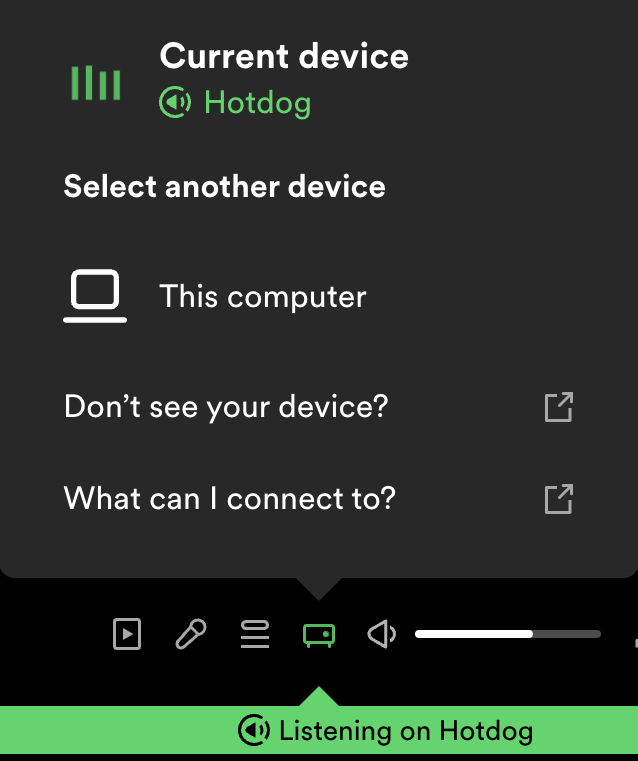
# 'Hotdog' is the device name that will show up in the Spotify UI
ExecStart=librespot --device=hw:CARD=HTA100 --name=Hotdog --device-type=avr
# this makes the service restart after 5 seconds if it crashes
Restart=always
RestartSec=5
- Run
systemctl --user daemon-reloadto reload info.
Now, you can start/stop the service using systemctl --user start librespot.service and systemctl --user start librespot.service. Check now that it works! Verify that it plays music while the service is running! You can also check the logs for the service with journalctl --user -f -b -u librespot.service.
Once that’s working, it’s time to get udev setup to automatically start / stop the service when the audio device is connected. ✨
Step 2: Configure udev
udev is a tool that allows you to configure your system to respond to hardware changes. The approach here is pretty straightforward in theory:
- When the correct soundcard is connected, tell systemd to start the Spotify Connect service.
- When that soundcard is disconnected, tell systemd to stop the service.
First, we need a way of telling the computer that we’re talking about a specific device – the USB Audio interface – so we need to hunt for some details that we can use to identify it.
Identify the device
The easiest way to identify the right device is to get udev to print info about all the devices being connected / disconnected, and then… connect and disconnect the device.
So: I run udevadm monitor --property, connect the device, wait for the logs to stablise, then press enter in the terminal a few times to create some visual separation, then disconnect the device.
The logs look something like this:
KERNEL[245.105148] add      /devices/platform/soc/3f980000.usb/usb1/1-1/1-1.1/1-1.1.3/1-1.1.3:1.0/sound/card2 (sound)
ACTION=add
DEVPATH=/devices/platform/soc/3f980000.usb/usb1/1-1/1-1.1/1-1.1.3/1-1.1.3:1.0/sound/card2
SUBSYSTEM=sound
SEQNUM=1608

KERNEL[245.105327] add      /devices/platform/soc/3f980000.usb/usb1/1-1/1-1.1/1-1.1.3/1-1.1.3:1.0/sound/card2/pcmC2D0p (sound)
ACTION=add
DEVPATH=/devices/platform/soc/3f980000.usb/usb1/1-1/1-1.1/1-1.1.3/1-1.1.3:1.0/sound/card2/pcmC2D0p
SUBSYSTEM=sound
DEVNAME=/dev/snd/pcmC2D0p
DEVTYPE=pcm
SEQNUM=1609
MAJOR=116
MINOR=80

...
It just keeps spewing for a while. But! We’ve now got the device path of the sound card that we connected:
/devices/platform/soc/3f980000.usb/usb1/1-1/1-1.1/1-1.1.3/1-1.1.3:1.0/sound/card2
… and we can ask udev for more info about it. Let’s run udevadm info -a --path [device_path] (make sure to reconnect the device first!).
In response we get a helpful paragraph about how to compose rules! And then more spew:
$ udevadm info -a --path /devices/platform/soc/3f980000.usb/usb1/1-1/1-1.1/1-1.1.3/1-1.1.3:1.0/sound/card2

Udevadm info starts with the device specified by the devpath and then
walks up the chain of parent devices. It prints for every device
found, all possible attributes in the udev rules key format.
A rule to match, can be composed by the attributes of the device
and the attributes from one single parent device.

  looking at device '/devices/platform/soc/3f980000.usb/usb1/1-1/1-1.1/1-1.1.3/1-1.1.3:1.0/sound/card2':
    KERNEL=="card2"
    SUBSYSTEM=="sound"
    DRIVER==""
    ATTR{id}=="HTA100"
    ATTR{number}=="2"
    ATTR{power/control}=="auto"
    ATTR{power/runtime_active_time}=="0"
    ATTR{power/runtime_status}=="unsupported"
    ATTR{power/runtime_suspended_time}=="0"

    ...
That’s probably enough info to write a rule! We can (hopefully?) just say “start the service whenever there’s a device that matches SUBSYSTEM=="sound" and ATTR{id}=="HTA100".
Write and test the rule
That article I linked earlier had an incredibly invaluable tip: whenever you’re messing with udev rules, figure out a clean way to check that the rules are working.
To do this, I added a pair of scripts which will log the time and whether a device was added or removed to a temporary log file:
#!/usr/bin/bash
# this file is /usr/local/bin/test_add.sh
echo "$(/usr/bin/date) add" >> /tmp/udev.log
#!/usr/bin/bash
# this file is /usr/local/bin/test_remove.sh
echo "$(/usr/bin/date) remove" >> /tmp/udev.log
Make them both executable:
sudo chmod a+x /usr/local/bin/test_{add,remove}.sh
Now it’s time to add the udev rules.
Make a file named /etc/udev/rules.d/10-spotify.rules, and give it the following contents:
SUBSYSTEM=="sound", ATTRS{id}=="HTA100", ACTION=="add", RUN+="/usr/local/bin/test_add.sh"
SUBSYSTEM=="sound", ENV{ID_MODEL}=="HTA100", ACTION=="remove", RUN+="/usr/local/bin/test_remove.sh"
These are the final rules that I used, but I spent hours trying to figure out the issues. There’s a bunch of syntax oddities here that caught me out, which is why I’m admonishing you, dear Reader, to test methodically and without skipping steps! The syntax gotchas that I tripped up on were:
Remember to use a double equal (
==) instead of single equal (=) for each filterThe output of
udevadm inforeturnsATTR{id}, but the correct format to use for the rules isATTRS{id}(note the extraS)For the
removeaction, you apparently can’t rely onATTRSbut have to rely uponENVentries instead, as per this StackExchange answer.
As far as I can tell, there’s no straightforward way to debug udev rules – I would’ve loved if they were e.g. validated on reload.
With that out of the way: reload the udev config:
sudo udevadm control --reload
…and then plug and unplug the device. Then run:
tail /tmp/udev.log
If everything worked, you should get something like this:
Sat Nov  4 11:07:57 CET 2023 add
Sat Nov  4 11:07:57 CET 2023 add
Sat Nov  4 11:07:57 CET 2023 add
Sat Nov  4 11:08:00 CET 2023 remove
Sat Nov  4 11:08:00 CET 2023 remove
Ok, so: something in this configuration is causing the “add” to match three times, but the remove to only match twice. That’s… annoying, but not something we need to debug here, because we’re going to make these rules start / stop systemd services, and if the service is already running, then starting it again won’t do anything! 🥳
I think if we were really committed, we could fix it with more precise rules (udevadm monitor showed us before that there were multiple devices matching this pattern). But it’s so annoying to troubleshoot udev rules that I didn’t want to spend any more time messing with it.
Step 3: Connect it all together
Now that we’ve got some ~reasonably working udev rules and a working systemd service, we just need to connect the two.
Modify the /etc/udev/rules.d/10-spotify.rules that we were using before to match this:
SUBSYSTEM=="sound", ATTRS{id}=="HTA100", ACTION=="add", RUN+="/usr/bin/su flopbox -c 'systemctl --user start librespot.service'"
SUBSYSTEM=="sound", ENV{ID_MODEL}=="HTA100", ACTION=="remove", RUN+="/usr/bin/su flopbox -c 'systemctl --user stop librespot.service'"
What we’re doing here is:
- changing from
rootto the lower-permissioned user that owns the librespot service (on my machine it’s calledflopbox) - starting that service.
Reload the udev rules again:
sudo udevadm control --reload
….and try it out! It should work! I hope!
Phew, Linux is wildly inscrutable sometimes
While I was putting this together, I ran across a number of other sources that had alternate ways of setting this up:
Apparently there’s a way of specifying the device as a direct dependency of the systemd service, which feels… maybe vaguely cleaner? But you still have to write udev rules and a systemd service, so there’s no advantage to me changing it at this point.
There’s an alternative approach using
ENV{SYSTEMD_WANTS}/ENV{SYSTEMD_USER_WANTS}which theoretically should do the trick, but which I couldn’t get working.Some people suggest using
--no-blockif you’re invoking the service withsystemd start, but omitting that hasn’t caused any problems for me yet.
I have no idea if these methods are better, or even what the tradeoffs of using these other approaches would be. I’m pretty frustrated at how difficult it is to get things working on linux sometimes – I wish there was more investment in making the system fundamentals easy to understand, configure and debug.
But! It works, and I’m grateful that it’s possible to build things like this at all. ✨
Now playing on HOTDOG
I promise I’m not doing that “audiophile thing” where they trash anything that’s not gold plated! This was a real issue on the RPI3 apparently. ↩︎
Including, among other things: ensuring that the same device retains the same name when you plug it in multiple times, and ensuring that USB removal storage has permissions set up so it can be accessed in userspace. ↩︎