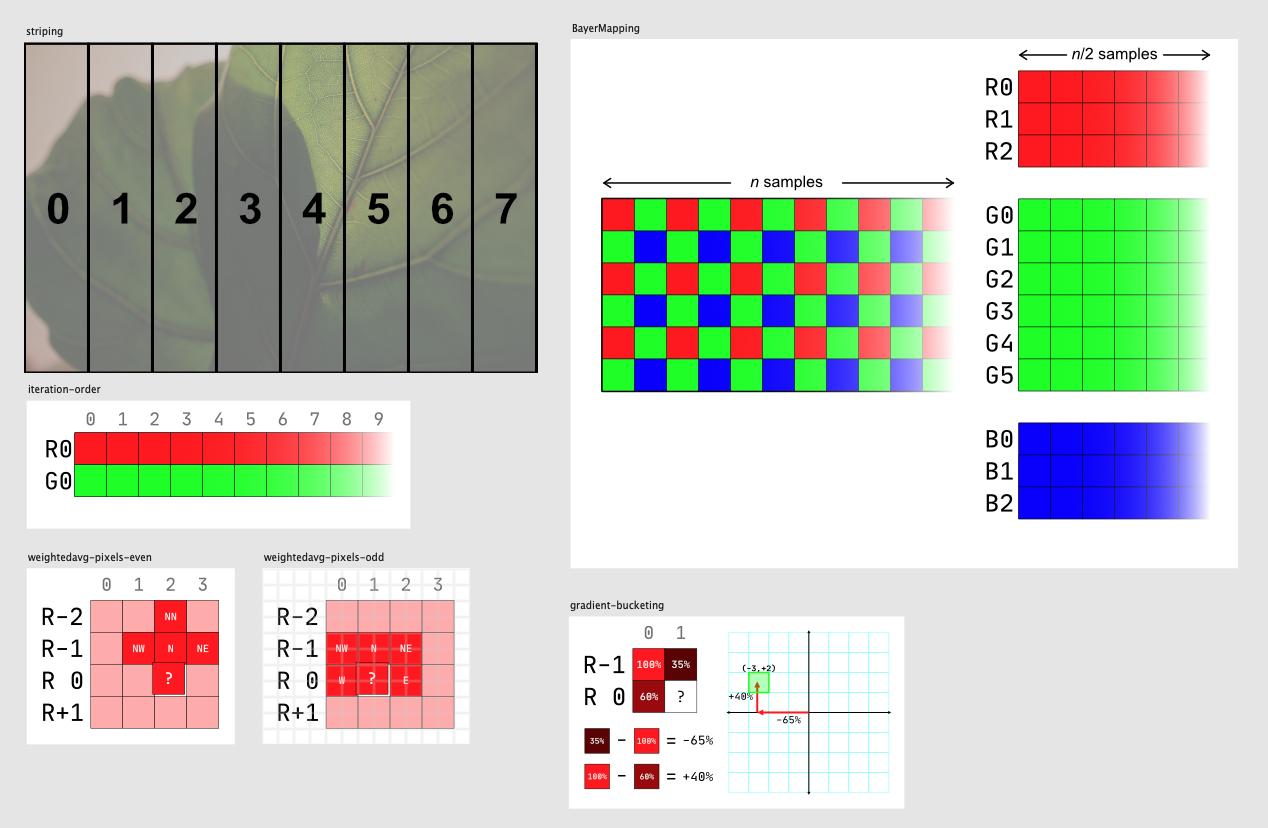
I’ve just published a piece on how Fuji’s RAW file compression algorithm works. I’d spent about two weeks trying to develop an implementation in Rust, and found that the underlying concepts were consistently difficult to explain using words alone. This algorithm is easiest to understand by thinking spatially, so being able to represent things visually in two dimensions is advantageous. I drew a lot of very rough diagrams on scraps of paper while figuring out how it works.
As I was writing the post, I realised that if I’m describing an algorithm, than I’m not just describing the way something is laid out; I’m also describing operations that are being performed upon that layout. If I wanted to try and explain the algorithm with diagrams, those diagrams would require lots of arrows or lots of explanation text, and that means that the reader would still have to “load a mental model” of what’s going on.
But, this was supposed to be a post on a website; it wasn’t intended for print. So, why not add some animations instead of drawing arrows all over the place?
In this tutorial, we’ll build an animated technical diagram, and set things up so that we can iterate on the design rapidly.
Draw and Export an SVG
First, let’s draw an initial diagram using a Vector Graphics tool. I used Affinity Designer for everything in this article, because I apparently purchased it in 2016, and found it easy to pick up quickly. Alternatively, Inkscape is free to use and open-source. The specific tool doesn’t matter much, but it is important that you’re able to export to SVG.
Here’s the diagram I’ll be using throughout this tutorial:
Our preliminary diagram! It’s an SVG; you can inspect the source.
If you’re working on a piece with multiple diagrams, start by drawing quick versions of each of them – you can go back and refine them later. I found that I’d developed a more coherent diagram style by the time I’d drawn the third diagram, after which I wanted to revise the first two anyway. You can use Artboards (sometimes also Slices, depending on software and context) to partition different sections in the same file into different diagrams. This makes it easy to re-use components, ensure visual consistency, and to export many diagrams together as a batch.
All diagrams for the article in seperate artboards in a single file.
Once you’re happy with how your diagram looks, add names to each of the objects you want to animate. If you want to animate multiple objects as a single unit, you can group them together and assign a name to the group. The names you provide will correspond to id attributes in the exported SVG later.
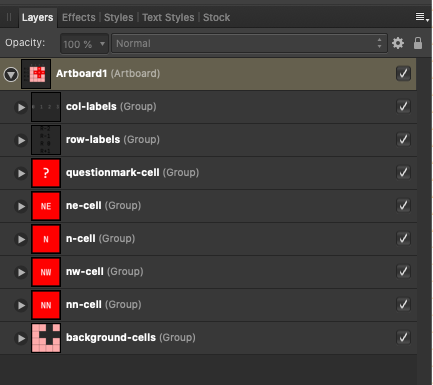
We’ll animate the objects nw-cell, n-cell, and ne-cell in this example.
Now, export your diagram to SVG. Pay particular attention to the following export settings:
- Rasterization Settings. Vector graphics programs often support more features than the formats they can export to, and they often handle those cases by rasterizing affected content into bitmap images. This doesn’t always cause problems for animation, but you won’t be able to animate something located within a rasterized group or layer. Turning off rasterization completely is the safest bet.
- Export Text as Curves. Just like on the web, the fonts you choose for your SVG files might not be available on your reader’s device. Export Text as Curves is a workaround for that, effectively ‘baking’ the font into an SVG Path, which will render consistently across all systems. This works well for larger font sizes, but generally produces less faithful representations for small type. It’s likely, however, that your design software has included some sensible fallback font options as part of the export. For small font sizes, it might be better to rely on that1.
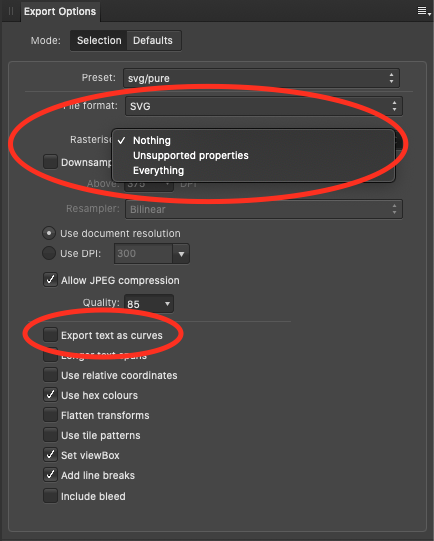
Affinity Designer’s ‘Export Options’ panel.
Cool. You’ve now got an SVG, ready for animating.
Our first SVG/CSS animation
Now it’s time to add some CSS Animations to the SVG in order to really liven it up. Again, for reference, here’s the diagram we’ll be animating today:
Tada!
Now, the goal is to fade-out the NW, N, and NE boxes in turn, to indicate ordering in an algorithm. We can write the CSS for one box fairly easily:
@keyframes anim-nw-cell {
    0% { opacity: 1}
    100% {opacity: 0}
}

/*
Recall: this is the label we applied to the element in
Affinity Designer, and therefore the element ID it was exported with.
*/
#nw-cell {
    animation: 1s ease infinite anim-nw-cell;
}
Animating the NW cell.
If, however, we want to animate two objects, and keep them looping infinitely using animation-iteration-count: infinite, and keep multiple animations in sync, then we need to make the animations for both objects the same length.
Let’s encode the following steps as a CSS animation:
- Wait 1 second
- Fade out the
NWbox over 1 second - Wait 1 second
- Fade out the
Nbox over 1 second - Wait 1 second
- Reset and loop infinitely
@keyframes anim-nw-cell {
    0%, 20% { opacity: 1}
    40%, 100% {opacity: 0}
}

@keyframes anim-n-cell {
    0%, 60% { opacity: 1}
    80%, 100% {opacity: 0}
}

#nw-cell { animation: 5s ease infinite anim-nw-cell; }
#n-cell { animation: 5s ease infinite anim-n-cell; }
Here’s how it looks:
Animating the NW and N cells
It looks good, but that’s a lot of extra thinking and animation keyframes just to make sure that both of these animations take the same amount of time. If we decide later to change the duration of the fade, or animate an extra element, we have to change numbers throughout the CSS.
Writing this by hand is getting tedious. Let’s script it instead.
Scripting CSS animations with Python
Here’s an example script which generates functionally equivalent CSS to our last example:
# cssgenerator.py

# all times in seconds
initial_delay = 1
fadeout_time = 1
wait_between_items = 1
elements = ['nw-cell', 'n-cell']

total_time = (
    initial_delay +
    (fadeout_time + wait_between_items) * len(elements))

def p(time):
    """Converts `time` to a percentage of total time for the animation"""
    return f'{time / total_time * 100}%'

def anim_for_elem(elem_id, idx):
    start_fadeout = initial_delay + (fadeout_time + wait_between_items) * idx
    end_fadeout = start_fadeout + fadeout_time
    print(f"""
        @keyframes anim-{elem_id} {{
            0%, {p(start_fadeout)} {{
                opacity: 1;
            }}
            {p(end_fadeout)}, 100% {{
                opacity: 0;
            }}
        }}

        #{elem_id} {{
            animation: {total_time}s ease infinite anim-{elem_id};
        }}
    """)

for idx, elem in enumerate(elements):
    anim_for_elem(elem, idx)
This is admittedly a lot more code (and definitely more complexity), but it gives us flexibility. Let’s say we wanted to make the whole animation quicker, and shorten the fadeout duration to 0.2 seconds, and the wait between fadeouts 0.5 seconds. We only have to change two lines:
- fadeout_time = 1
- wait_between_items = 1
+ fadeout_time = 0.2
+ wait_between_items = 0.5
Or, let’s say we wanted to add the NE element to this sequence. It’s as simple as adding an element to the list:
- elements = ['nw-cell', 'n-cell']
+ elements = ['nw-cell', 'n-cell', 'ne-cell']
The most useful property of this technique is that it facilitates a state of flow when tuning timings and making your animations tighter. By parameterising the CSS generation, you’re able to change a single value and see a result. Accordingly, you’re able to attend to the aesthetics of the animation, and avoid the chore of calculating keyframes by hand. ✨
Here’s our diagram with our new tweaks:
The tuned animation is much snappier ✨
Automating the build for faster design iteration times
I love using Hugo for this blog because of its live-reloading functionality – I can change a file, hit “Save”, and see the results in my browser window instantly. That feedback cycle is so addictive!
In contrast, tuning these animations was slow and frustrating – at first, I had to:
- Change a number in the script
- Run the script
- Copy the output
- Open the SVG file
- Paste the generated CSS into a
styletag in the SVG - Save
- Reload the browser tab I was previewing in.
That’s 10 seconds of chores just to change a number.
It’s possible to automate all of those chores, though, and doing so made the development process much more gratifying. Here’s how.
First, install a few packages:
watchgod, which runs code when something on your filesystem changesbeautifulsoup4, my all-time favourite XML/HTML wrangling librarylxml, which is required so that BeautifulSoup can load / write SVG files (which are secretly XML) correctly!
Now, we’ll need two scripts, one to watch for changes, and one that edits the SVG with our animations.
Here’s the watcher script:
# watch.py

import subprocess
from watchgod import run_process, AllWatcher

def runner():
    # We're running the edit script in a separate
    # process, so that we don't need to figure out
    # how to reload python code if it's changed.
    subprocess.run(['python', '-m', 'build_fade'])

if __name__ == '__main__':
    # by default, WatchGod only watches for changes in .py files;
    # this watches for everything (including SVG files).
    run_process('.', runner, watcher_cls=AllWatcher)
And here’s the edit script:
# build_fade.py
from os.path import expanduser
from bs4 import BeautifulSoup


def generate_css():
    """Generate the CSS animations in this method.
    Rather than use `print` as we did before, use `yield`,
    to make the generated CSS easier for calling code to capture.
    """
    initial_delay = 0.5
    fadeout_time = 0.2
    wait_between_items = 0.5
    elements = ['nw-cell', 'n-cell', 'ne-cell']

    # ... redacted for brevity ...

    for idx, elem in enumerate(elements):
        yield anim_for_elem(elem, idx)

def main():
    input_filename = 'diagram-export.svg'
    # Have to save somewhere other than current directory; otherwise
    # writing this file will cause WatchGod to detect a change
    output_filename = expanduser(
        '~/Desktop/diagram-export-animated.svg')
    all_css = "\n".join(generate_css())

    # Load / Parse the SVG file using BeautifulSoup
    with open(input_filename) as infile:
        soup = BeautifulSoup(infile, 'xml')

        # add the newly generated CSS to the XML
        style_tag = soup.new_tag('style', id='stylegen')
        style_tag.string = all_css
        svg = soup.find('svg')
        svg.insert(0, style_tag)

        # while we're here, let's set a width so that it renders with
        # a sensible default size when embedded in a webpage
        # (there's an extremely detailed guide here:
        # https://css-tricks.com/scale-svg)
        svg.attrs['width'] = '585'

        # Write amended SVG to OUTPUT_DIRECTORY.
        with open(output_filename, 'w') as outfile:
            outfile.write(str(soup))
    print(f'Wrote styled version to {output_filename}')

if __name__ == '__main__':
    main()
Finally, if your vector illustration software supports it, turn on Continuous Export. This re-exports your diagrams to SVG whenever you change your source diagram file.2
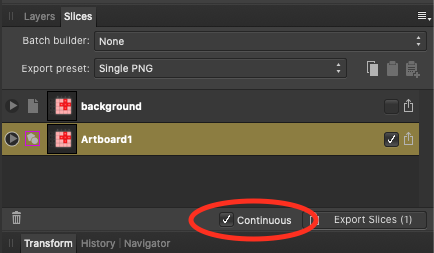
Continuous Export Setting in Affinity Designer
Now, we should be able to run python -m watch and have it automatically detect changes in both the SVG and Python file, and then automatically construct the animated SVG 🎉.
Your workflow should now be:
- Make change to either the python animation file, or the diagram in your vector illustration software
- Hit reload in browser.
Rad.
Pop-n’-fade
Let’s make one more change to our animations, now that we can preview changes easily. I think it would look really cool if our animated boxes ‘popped out’ of the page slightly, before fading into oblivion.
Let’s modify our generation code to shift each box up and to the left before fading out:
# build_pop_n_fade.py
def generate_css():
    initial_delay = 2
    popout_time = 0.2
    wait_after_pop = 0.5
    fadeout_time = 0.2
    wait_between_items = 0.5
    elements = ['nw-cell', 'n-cell', 'ne-cell']

    time_per_element = popout_time + wait_after_pop + fadeout_time + wait_between_items

    total_time = initial_delay + time_per_element * len(elements)

    def p(time):
        """Converts `time` to a percentage of total time for the animation"""
        return f'{time / total_time * 100}%'

    def anim_for_elem(elem_id, idx):
        start_popout = initial_delay + time_per_element * idx
        end_popout = start_popout + popout_time
        start_fadeout = end_popout + wait_after_pop
        end_fadeout = start_fadeout + fadeout_time
        return f"""
        @keyframes anim-{elem_id} {{
            0%, {p(start_popout)} {{
                opacity: 1;
                transform: translate(0,0);
            }}
            {p(end_popout)}, {p(start_fadeout)} {{
                opacity: 1;
                transform: translate(-2px,-2px);
            }}
            {p(end_fadeout)}, 100% {{
                opacity: 0;
                transform: translate(-2px,-2px);
            }}
        }}

        #{elem_id} {{
            animation: {total_time}s ease infinite anim-{elem_id};
        }}
        """

    for idx, elem in enumerate(elements):
        yield anim_for_elem(elem, idx)

# ... other methods unchanged, redacted for brevity
Here’s the final result:
Nice.
Future work
I’m super happy with how these turned out, and I think they have significant value for explaining some of the more complex concepts in the compression algorithm article. There are, however, a few changes I’m considering for next time:
Animations currently play by default and loop forever. I chose this because it meant I didn’t have to design UI around playing and pausing animations, but that choice has a couple of drawbacks:
- It only works because the animations are short and repetitive – if my readers start focussing on it halfway through the animation, they’ve only got to wait a couple seconds before they’ve caught up.
- A friend found the auto-playing animations distracting. I suspected it might have been distracting to some people? But I wanted confirmation before I put in the extra work.
If I use this technique again for future posts, I’ll build a system such that the animations are able to pause and resume3.
There’s a lot of repetition in the python scripts, and I think it would be worth extracting some common functionality in to a library. It would be nice to have a fluent-style API for managing timing dependencies. As an example:
# translate (-2px,-2px) over 0.2 seconds
(nw_cell
    .translate(0.2, -2px,-2px)
    # wait half a second
    .wait(0.5)
    .fadeout(0.2)
).then(n_cell
    .translate(0.2, -2px,-2px)
    # ... etc
)
I hope you found the tricks in this post interesting! If you’re looking for more resources, you can take a look at the source code / diagram for this article here, and please get in touch if you’ve got thoughts / comments / questions.
SVG’s aren’t allowed to hit the network to fetch external webfonts when they’re embedded using an
<img>tag. This StackOverflow answer outlines your options, and if you decide to embed fonts in your SVGs using data URIs, you might be able to use a pre-written tool, such as svg-embed-font. ↩︎At least, mostly, when making changes in Affinity Designer. Sometimes, when I changed object IDs, I’d have to manually move something around on the page to get it to re-export. ↩︎
It seems like the best way to start / stop animations would be to apply some the techniques listed here for animated gifs, as I’m currently using the SVG images in an
<img>tag, which means I’m unable to control the CSS animations from the HTML’s Javascript. I could alternatively inline the SVG graphics into the document, but that would mean writing code to make sure all the different CSS animations could coexist, whereas I don’t need to worry about that when the SVGs are included as images. ↩︎