The latest board game obsession in my household is Forest Shuffle. It’s an extremely cute game that’s just the right amount of competitive; if you like Wingspan, you’ll probably like this (I think it’s easier to pick up, and less engine-building-y).
Since it first came out, the developers have released two expansion packs which make the game even better (and also, one of them is mountain-themed, and it makes my heart sing). There’s just one problem: the expansions don’t fit in the original box! There’s plenty of space in the box itself… but the cardboard insert on the inside doesn’t have enough room for the extra 72 cards from the expansion.
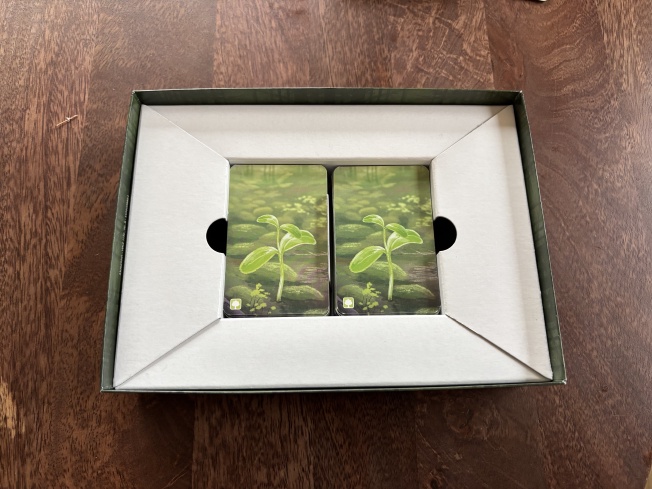
Just enough space for the base game
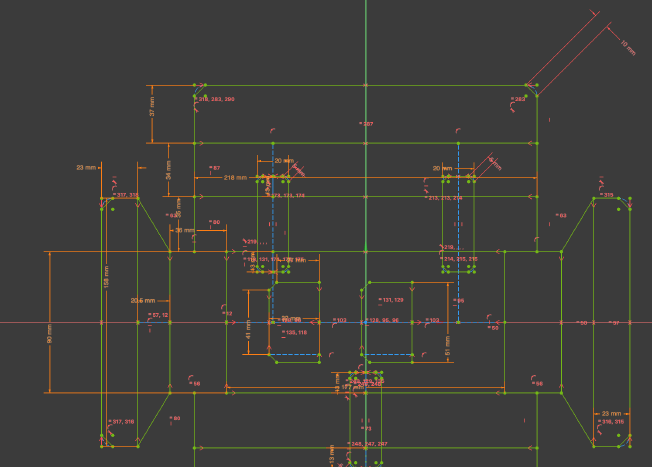
Surely we could fit an extra column of cards in there if we made a custom cardboard insert1?
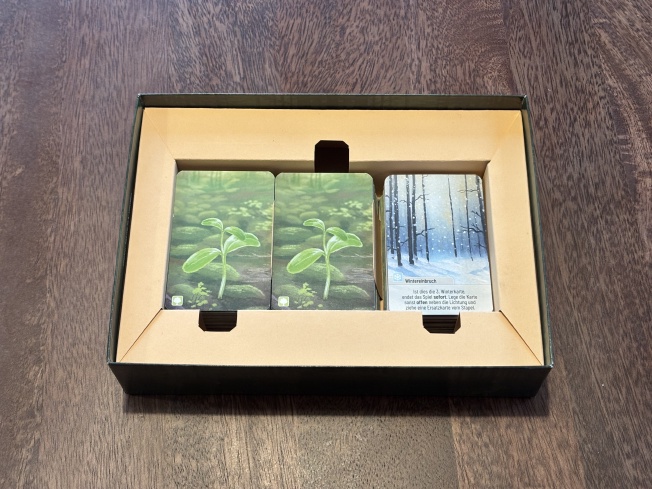
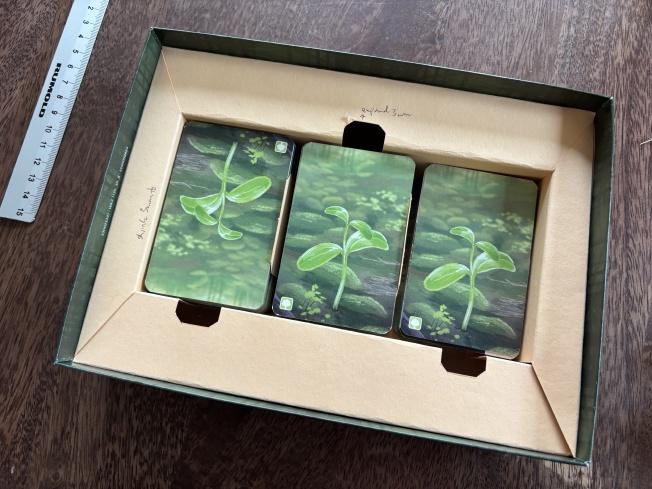
Now with space for THREE STACKS
I made it into a template that you can print at home, so you can make one for yourself. Here it is:
Here’s what you’ll need
- The pattern (above)
- A piece of cardboard at least 35x35cm (note that this is bigger than A3)
- A sharp knife and a cutting mat, and a hard edge to run the knife along (a 30cm+ ruler would work great)
- Glue, or another way to attach the printout to the cardboard
- For best results, a bit of patience. I reckon it’d take about 45 minutes for assembly.
You could probably save yourself a bunch of time if you had something that could print A2, especially onto cardboard. Or a laser cutter.
Instructions
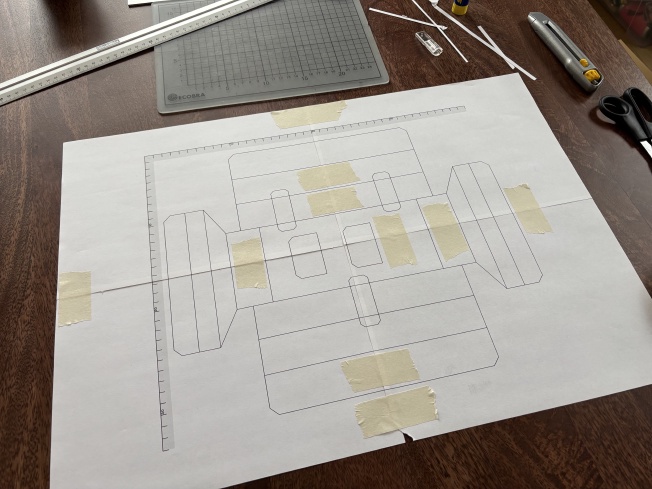
One: Print the pattern. If you’re using the A4 version, you’ll need to stitch it together. There’s a 2cm overlap between the sheets – use the rulers on the edges of the pattern to check alignment and scaling. You’ll need to trim the edge on the sheets that overlay other sheets (a total of 4 edges, two horizontal, two vertical). You’re going to invest a lot of time and energy based on this pattern, so check your work after this step!2
An earlier prototype. My printer has a 5mm dead zone around the edge of the page, you can see the trimmings in the top right corner of the photo (and also that my knife wasn’t sharp enough and tore the page).
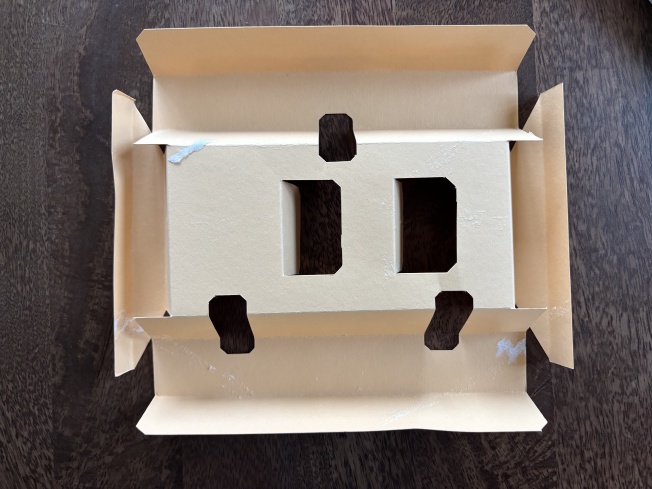
Three: Transfer the markings onto the cardboard. My favourite way to do this is by glueing the outside edges of the pattern to the cardboard. You have to work a little carefully after you’ve cut most of the lines (the pattern might slip?), but I found that it was manageable. Then, you can measure the few remaining fold lines and draw them on.
If you’re not feeling confident doing that, you can just glue the whole thing and peel it off again afterwards. It does leave some evidence but you can make that the back-side of the insert so you won’t be able to see it in the finished result:
Good enough? 💅🏼
Four: cut along the solid lines, fold along the dotted lines. When folding, you’ll get crisper lines if you fold along the edge of a ruler. Note that the pattern doesn’t specify fold direction, but you can figure it out from the photos here :)
I designed this with FreeCad
I made the initial prototype for this insert by hand, and then re-did it in FreeCad’s sketch tool. FreeCad is mostly for 3D designs, but it was super fun for this – FreeCad is a parametric design tool, which means that I could specify a bunch of design parameters in a spreadsheet, like this:
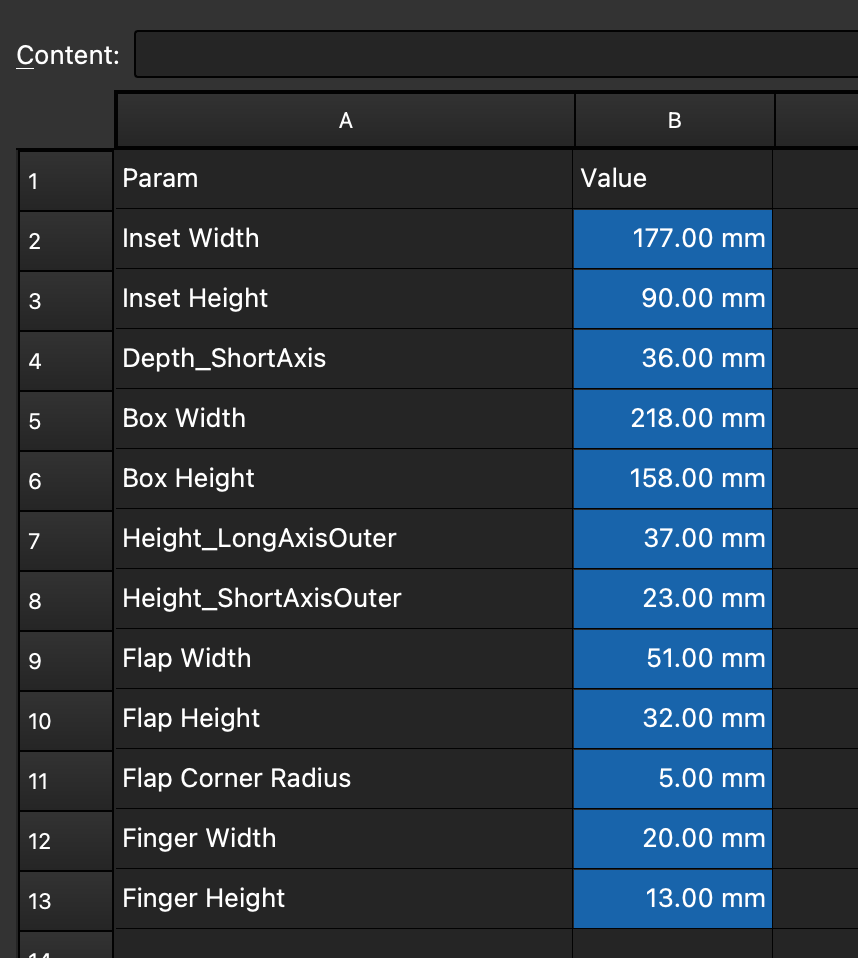
Naming is hard
…and then if you modify one of those values, it’ll update everything automatically (assuming you’ve designed it right and the changes aren’t too big). This turned out to be great for iterating: an early prototype was too wide and had finger-holes that were too narrow for my chunky fingers:
The nice thing about working in cardboard is you can write directly on the prototype
Changing those params meant I just had two change two numbers in the spreadsheet and then everything updated correctly. ✨ I’d totally use this for 2D work again.
Freecad! I’d probably try and figure out how to break the design up into smaller pieces next time.
That’s it!
That’s it! If you try building this let me know if it worked for you! I’d also love to hear about your most outlandish Forest Shuffle strategies so I can surprise my friends with them 👀
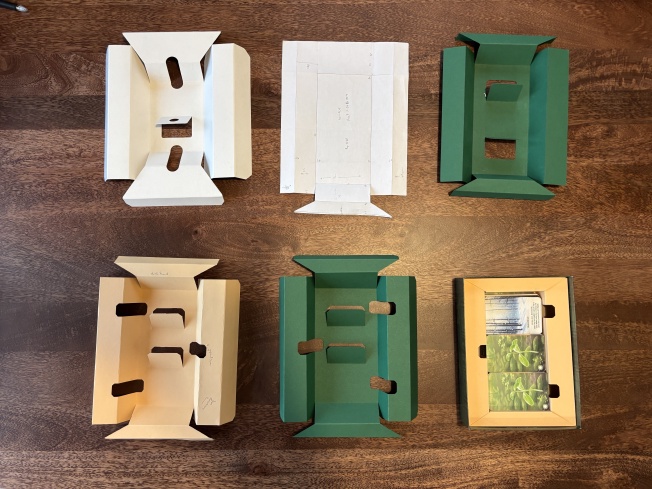
Prototypes from left-to-right:
- Original insert that ships with the game.
- First paper prototype to check that I had the basic geometry right.
- First cardboard prototype. It’s great except I forgot to add the long flaps, which add loads of structural stability.
- First CAD prototype. Also adds finger holes so that you can lift stacks of cards out easily. I accidentally added extra stability flaps to this one.
- What was supposed to be the final version, but I messed up sticking the pattern sheets together and it’s a centimeter too wide 🥲
- Final version. The green looked much better, but I used my last green cardboard on Iteration 5, and it’s Sunday so all the stores are closed. Tja.
You could also just… use Lego or 3D print one, but… the original insert was really cleverly designed and so I sorta wanted to recreate that. ↩︎
I added the zigzags (⦚) in the rulers because I botched this the first time and discovered after assembling everything that I’d made it a centimeter too wide 😐. ↩︎