It is a truth universally acknowledged, that a man in possession of a good set of drawers, must be in want of a good organization system.
Neat.
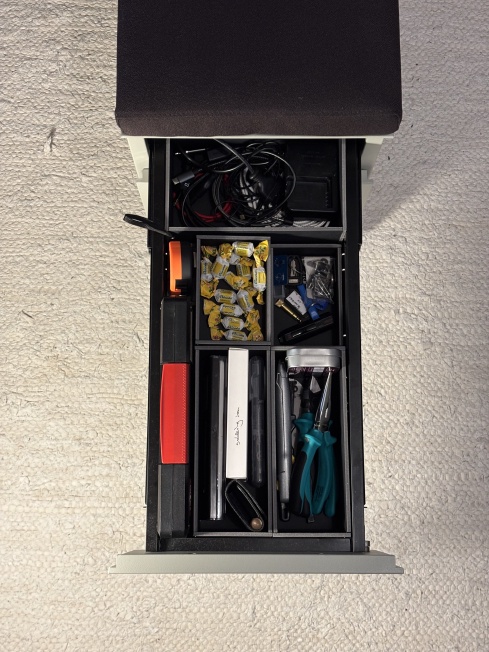
Last year, I bought a Bisley chest of drawers on wheels (it also doubles as a handy pull-out seat if you slap a cushion on top), and it’s been drawer chaos since then. Absolute mayhem; cables getting tangled with old keyrings, snacks sitting uncomfortably close to strong glue.
I hunted around for off-the-shelf drawer organisers, but didn’t really find anything that fit my needs. And then I stumbled across Foamcore.
🤘 #FOAMCORE 🤘
It sounds like a siiiiick music genre, but it unfortunately isn’t. It’s two sheets of paper with a layer of hard, dense foam between them. At my local crafts supplies store, it comes in 500 x 700mm sheets, in black and white. And it’s perfect for making boxes and organizers.
In addition to the board, you’ll need:
- A sharp knife: a box cutter, pen knife, etc.
- A hard edge: a ruler will work, but it’ll be much easier with a carpenter’s square because then you can brace against a known straight edge.
- A cutting mat so that you don’t accidentally carve into your work surface.
- Craft glue of some kind.
- Small pins, for holding panels in place while the glue sets.
Once you’ve done that, the steps are:
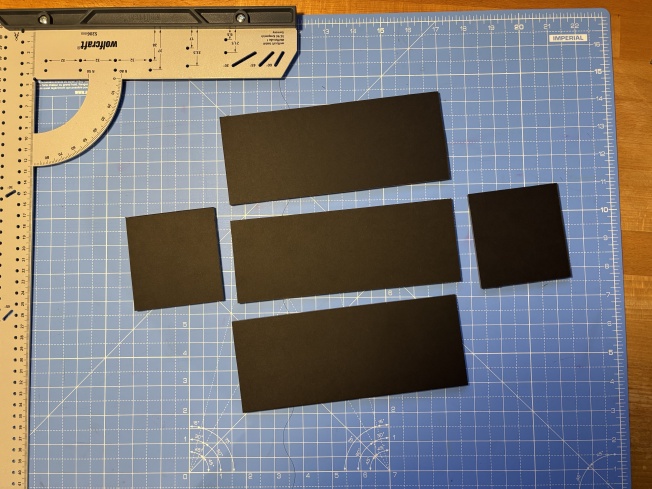
Figure out all the shapes you’ll need (more on this soon)
Cut them out
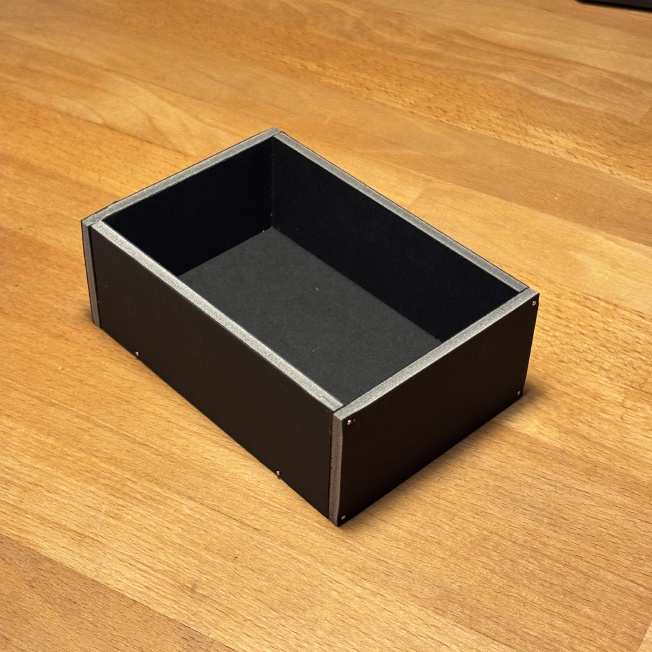
Glue / pin them together. Start with the base and the two sides that have an edge that matches the base. This makes a little more sense if you look at the exploded view:
See how the left / right pieces are longer than their corresponding edges on the base?
They’ll go better if you attach the top / bottom pieces to the base first.That’s it! In theory you can (should?) remove the pins after the glue’s set, but my pins came in a “lifetime supply”-sized box and are very small, so I just leave them in. They look kinda cool.
85 (width) x 128 (depth) x 45 (height).
Figuring out the shapes you need
If you’re impatient: I built a calculator. Go use it:
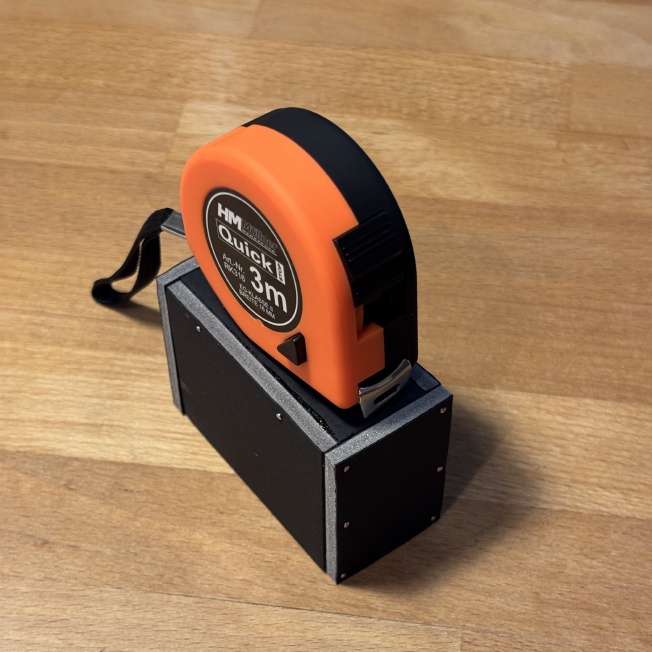
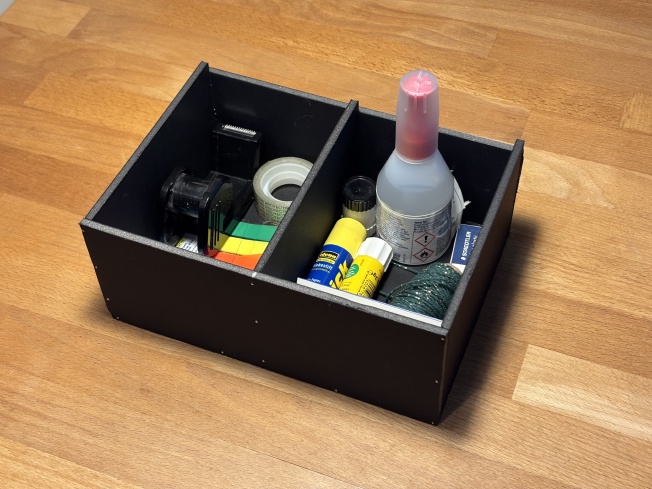
I’ve been building open boxes with a base, which is super helpful because you can lift the boxes clean out of the drawer with all of their contents.
To figure out the panel sizes: assume a box of width W, depth D, and height H. If your foamcore board has a thickness of 5mm, you need
- two sides that are W x H
- Two sides that are (D - 10mm) x H
- One base, (W - 10mm) x (D - 10mm).
The tricky (fiddly, error-prone) part of the calculations is that the thickness affects the geometry.
The other tricky bit is figuring out how many sheets of foamcore board you’ll need – that’s why I built the calculator. If, however, you’ve got a surplus of foamcore and are trying to avoid using a computer while you’re crafting, a pretty good heuristic is:
- Cut a bunch of strips that are as thick as your box height. If you’re making 80mm high boxes, cut strips 80mm thick.
- Then you can cut all the wall panels directly out of those strips; the only thing you need to think about separately is the bases.
Also, warning: if you’re planning on completely filling a space (e.g. a drawer or a board game box), measure the inside carefully and then check the fit with an offcut. It’s super annoying when you’ve spent twenty minutes building a box and then discover that it’s a millimeter too big. 😐
Box variations
You don’t have to just make five-sided, open boxes!
Risers
You can add a riser for objects that you want to keep handy but would otherwise sit too low in the drawer to make them grabbable. This is just a 5-sided box, upside-down:
I debated whether I should even include this
Stackable
You can duplicate the base panel, shave a millimeter off the sides of your duplicate, and then glue the two bases together to make something that stacks and conveniently stays put when you wiggle it:
Stack ’em
Dividers
You can make a box with a divider, by adding an extra panel that’s (D - 10mm) x (H - 5mm):
Figuring out the pinning / gluing order is left as an exercise to the reader.
It’s pinned / glued on the underside, too.
Building a calculator
I built the calculator app because I made frequent mistakes while cutting things out. It was very helpful to plug box dimensions into the calculator, cut everything out, and then check that I’d cut all the right pieces:
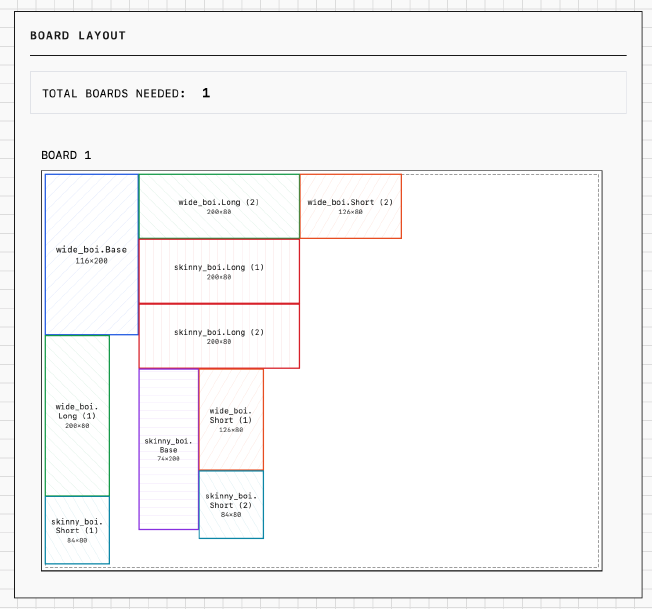
Calculated result
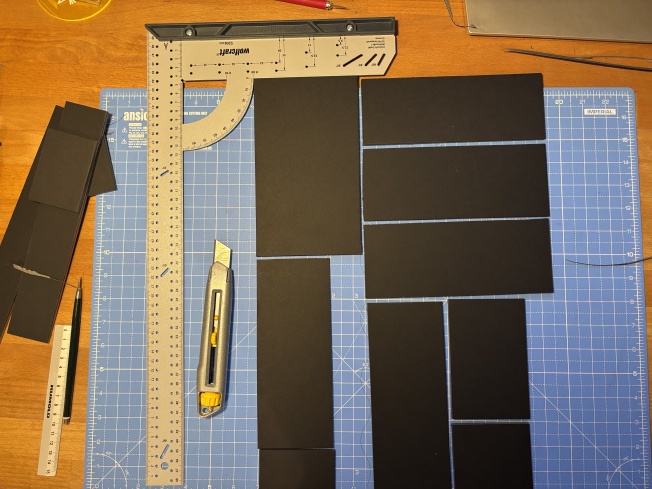
Cut out panels. Feels good, man.
I built the calculator in about 3 hours using Claude Code. The experience was generally very impressive (way better than last time I tried vibe coding) and also mildly depressing. I’m still sorting through my thoughts on this, but stay tuned; I’ll write up something Soon™️.
Links
- There’s some more good general advice on A Fractal Thought, especially targeted for making board game organizers.
- r/foamcore seems to be mostly people showing off their projects but it’s good for inspiration :)