My good pals Tom and Mikaely moved from the greater Wollongong1 area to Roseburg, Oregon, back in 2015. Mikaely got a job in a zoo, and Tom got a job doing sales at an engineering company.
I’ve somehow ended up seeing them once a year since, usually around Thanksgiving, and they’ve somehow been in a different state every time. In 2018, I dropped in on them while they were living in Las Vegas after I’d met up with some of my colleagues in Vermont. I mean, once you’ve crossed that ocean, the next five hours from Burlington to Las Vegas doesn’t seem so far.
I was chatting with Tom about film photography – one of my colleagues is super into it, and we’d been talking about it for most of the week. Tom says “hey, actually, I’ve got four film cameras – you can have one if you want.” It turns out there’s a lot of downtime when you’re living in Roseburg, and Tom had spent it looking for bargains at flea markets and garage sales. Looking for bargains at flea markets, garage sales, and in the local Trading Post is a bit of an Australian pasttime.
I ended up leaving Tom’s that weekend with a Minolta X-700, which, as it turns out, was the last film camera Minolta released without autofocus.
When I got back to Berlin, I loaded it up with a roll of film, and would’ve probably shot an entire film pitch black if Jackie hadn’t been there for the first photos, and realised that the auto-exposure was completely broken:
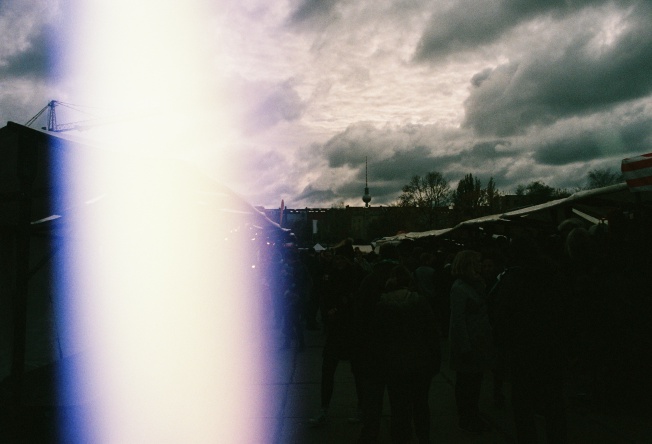
The Berlin Mauerpark Flöhmarkt, 27 Oct 2018. About 4 stops underexposed.
In addition to the autoexposure being off, you’d be hard-pressed to miss the huge burn-mark across the shot here. Over the whole roll of film, it produced some really beautiful results, but it really depends on the specific photo, and presumably on how quickly you take the photo immediately before and after:
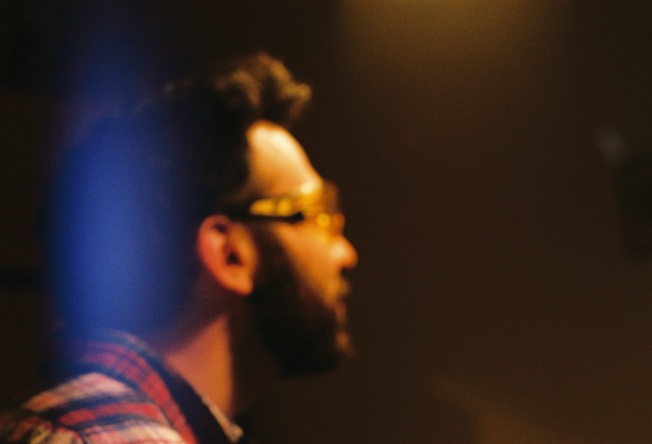
Me, out of focus and with safety glasses.
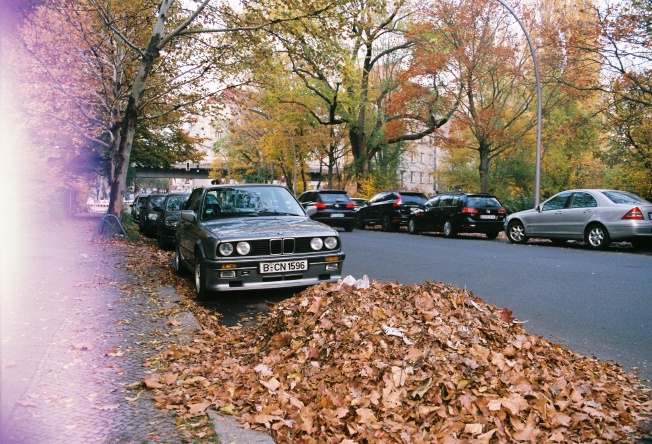
Waterloo Brücke, Kreuzberg, Nov 2018.
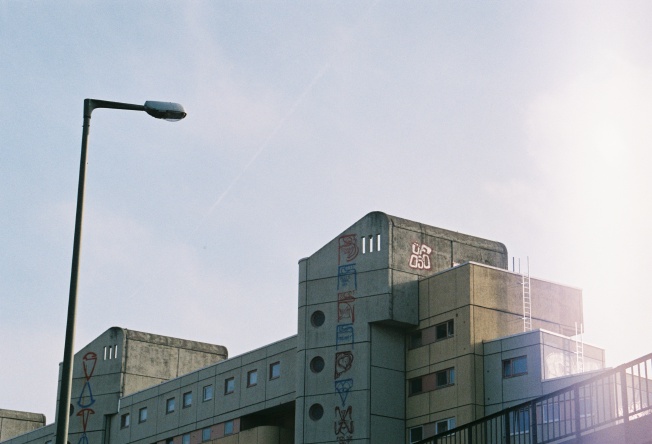
Am Skalitzer Straße, Kreuzberg, Nov 2018.
After getting the roll of film back, I decided to fix the light leak. And figured I’d have a go at the autoexposure whilst I was at it.
It’s now August 2019, and the autoexposure is still broken, but it’s also not so important in the end2. That light leak, however, was worth fixing.
So… are you sure it’s a light leak?
After poking around online a bunch, it seems like there’s a lot of confusion between whether something is a shutter problem or a light leak. It seems like light leaks are much, much more common, and a sure-fire way of identifying the problem is checking whether the film edges outside of the frame are exposed3:
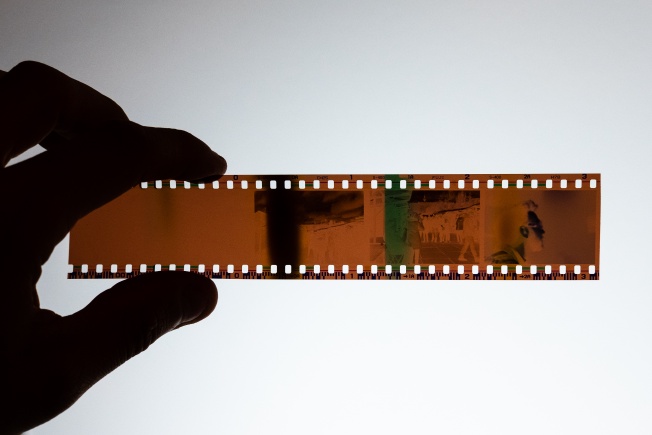
Negative frames 1 thru 3
Note that the border has been exposed on the top of all three frames, and that before the first frame, there’s an exposed region even though a photo hasn’t been taken. This pretty clearly points to a light leak instead of a shutter problem:
- shutter issues would cause aberrations in the actual image, but wouldn’t expose the border of the film, and
- the shutter didn’t even fire for the first exposed region on the film. The exposure in this frame was probably a result of winding the film on whilst standing in direct sunlight.
Replacing the light-insulating foam
At this point, you can decide to either:
- take the camera to a repair shop,
- buy a pre-made light seal kit online, or
- do it yourself.
It didn’t seem particularly hard, and I had nothing to lose, so I had a go at it myself. Here’s what I did.
Step 1: Grab some replacement foam.
I grabbed my replacement foam from CameraMill.co.uk. You can find it on eBay and probably Amazon too, the keywords are “camera light seal foam”.
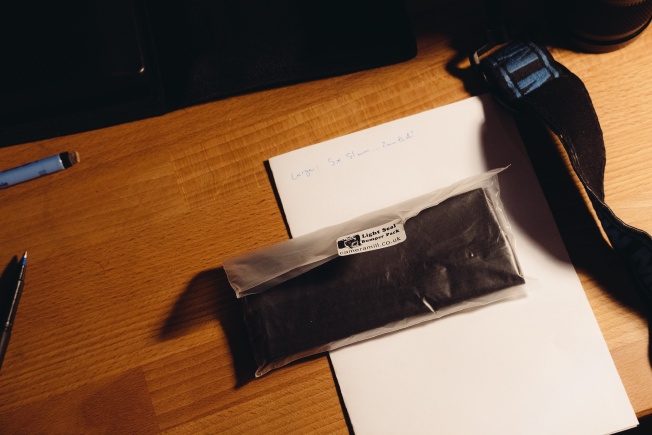
Light foam pack
Step 2: Determine the size of the foam pieces already in your camera.
I’d advise doing this before removing the foam; just in case it falls apart when you’re removing it. Here’s my highly scientific method:
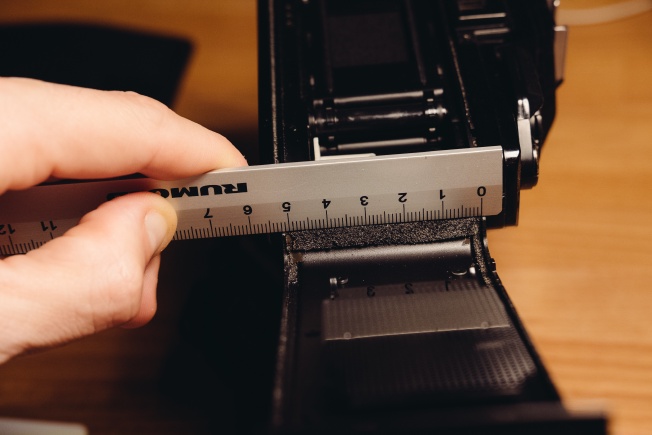
Measuring length
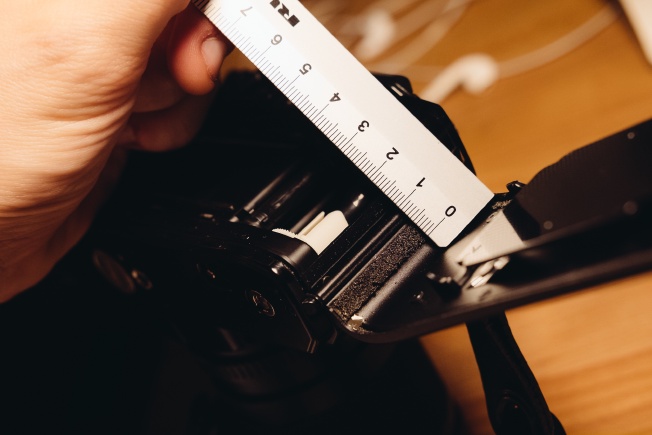
Measuring breadth
Note also that you can see the erosion of the foam in these photos – the texture is extremely uneven, and touching the foam caused it to crumble under my fingers.
How do you figure out which thickness of foam you need? Yeah, I also didn’t have a good answer for this. The foam pack I bought had 1mm, 2mm and 3mm thick foam; in the end, I just went for 2mm everywhere. Measuring the foam directly it is not going to be super effective, because the foam in the camera already has decayed significantly (which is why we’re replacing it!). You could try and measure the cavity, but that’s really hard to do. You can try the service manual for your camera if you can find a scan online, but they often just include part numbers, not measurements. In the end, I just eyeballed it. It’s better to try something thicker rather than thinner, because thick foam will compress down, but if the foam you use is too thin, then you’ll still get light leaks (just, more subtle ones. But this could actually be a really nice effect depending on your taste).
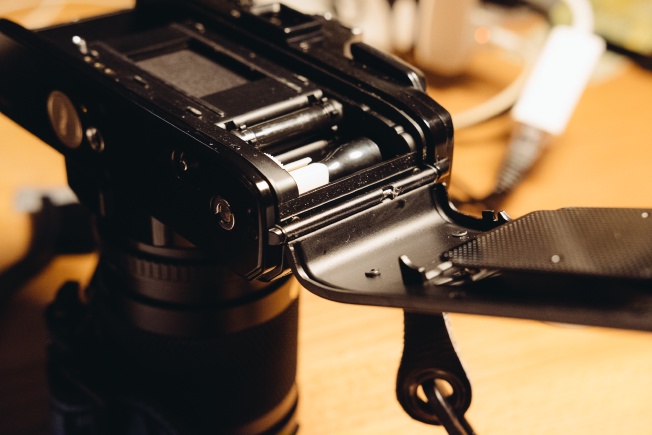
Step 3: Take a photo of all the existing foam whilst it’s still in your camera.
This is a general trick I’ve taken to when repairing anything, because it’s usually much easier to figure out how to pull something apart than it is to figure out how to put it together again. In this specific case, you’ll be grateful that you took this photo when you’re installing your newly cut foam and want to ensure it’s in the right place.
Step 4: Remove the old foam.
There’s two pieces to this:
- Remove the sticky strip
- Remove any residual on the inner surfaces of the camera.
I removed the sticky strips with a pair of tweezers, and they came out completely intact and in-shape. This turned out to be really helpful, because then I could stick them onto a sheet of paper and double check my measurements without having to deal with the weird angles when they were mounted on the camera:
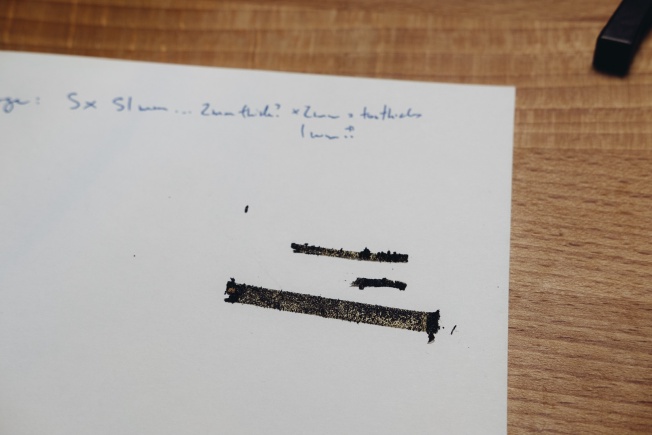
Old insulation, after removal. The removal process has really finished off the foam; it’s practically just slightly stained glue tape at this point.
There’s three pieces here – one for the top, bottom, and side of the door, and they’re all slightly different sizes. Depending on your camera, you may have more or less, or they may be present in different configurations4.
To clean up the residue, grab a cotton ear-thingy5 and some rubbing / disinfectant alcohol / cheap whisky and just go over where the residue was.
Removed and cleaned.
Step 5: Cut the new foam to size
On your new foam, you’ll probably have paper backing. Draw lines on it to match the dimensions what you’ve measured, and then cut it with a really sharp knife.

Ready for cutting
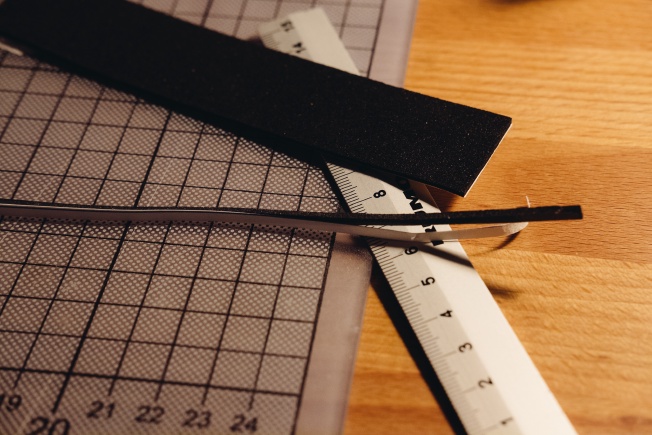
Replacement top and bottom strips
These pieces need not be perfect and it’s very difficult to get them perfect without a laser cutter / CNC / precision equipment. That’s ok! They just need to be sized so that light can’t get in.
Step 6: Stick the new foam pieces on.
Refer back to the photo you took in Step 3. You definitely took that photo, right? Take each piece of light insulation foam, remove the backing paper, and stick them in the places indicated by your photos.
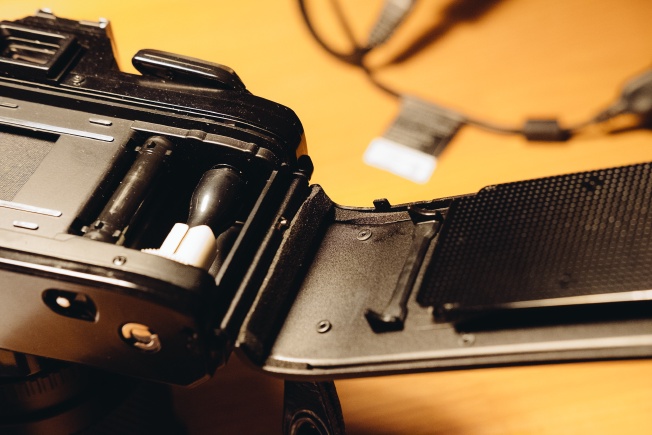
Done!
Note that this installation job was by no means perfect – you can see that the top piece of foam is twisted, and the big side piece has jaggy edges. I’d previously decided that I was going to verify that the seal replacement was working before running a whole extra film through, so, rather than immediately redoing it, I decided to just go ahead with my test plan and see if it would work or not.
Step 7: Verify that your fix worked.
Something that’s really satisfying about film photography is not knowing how your photos are going to turn out until you get the film developed. That, however, is a thorn in your side when you’re trying to fix the camera itself. So how do we test that the film door is effectively light-sealed without running a whole roll of film through it?
One human on the Photography StackExchange had this incredible idea:
Procure a tiny key chain flashlight. It must be tiny and it must remain on after being switched on. Place the flashlight inside the camera. Now go to a room or closet you can make dark. Stay in the dark examining the camera from all angles. The theory is, a breach that allows light to leak in will also leak out. If the breach is tiny and the light leaking out is feeble, you will need about 15 minutes to dark adapt.
I didn’t have a tiny key-chain flashlight on hand, but I did have an LED, a handful of resistors, a small battery, and lots of electrical tape, so I whipped one up myself:
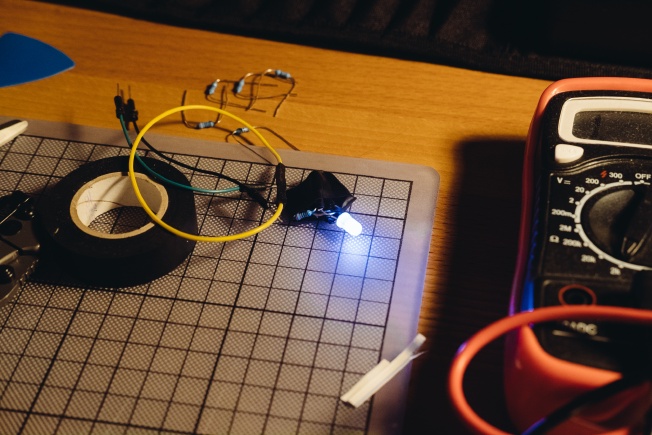
Bootleg keychain light
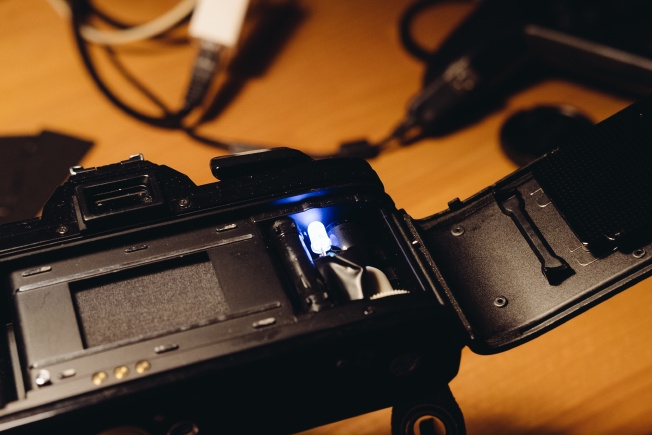
Testing for light leaks
I then stuck it in the film compartment, and took the camera under a rather heavy blanket for ten minutes and waited for my eyes to adjust6. Set an alarm so that you know when the ten minutes are up – if you look at anything with a backlight you’ll need to wait for your eyes to readjust again.
Another roll of film
When the next film came back a month later, the leaks were gone:
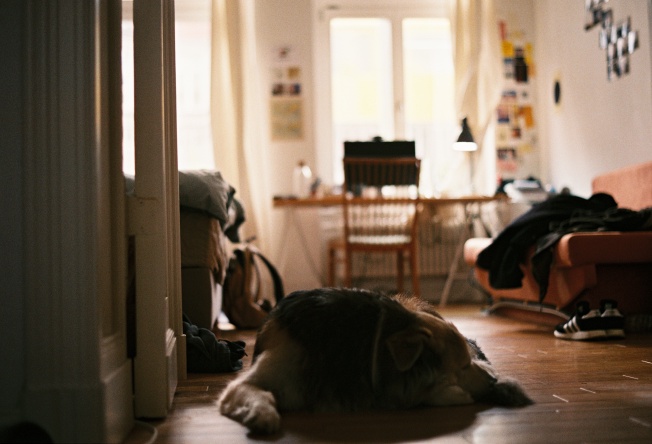
My favourite housemate, The Bär, Jan 2019.
Tempelhofer Feld, Jan 2019.
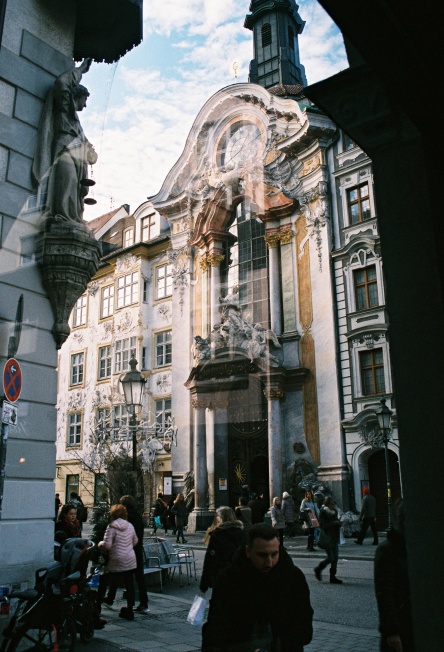
Munich, Dec 2018.
I hope you’ve found this helpful! If you’ve got feedback or questions, please get in touch.
My hometown! It’s a real place; it’s pronounced Wool-on-gong and it has some beautiful beaches and a real university. ↩︎
You can get super accurate light meter apps for your phone nowadays, or find real light meters at the Flöhmärkte in Berlin (this Werralux model is straight out of the 1950s, is both common and surprisingly accurate). ↩︎
There are some other great strategies and ideas in this thread on the Photos StackExchange network, and we’ll use one of these to verify that we’ve fixed the problem later. ↩︎
Notably, on the Minolta X-700, there’s another piece of foam that I didn’t replace as part of this operation – the “mirror cushion” or “mirror damper”, which apparently exists so that the mirror doesn’t smack against the roof of the camera when it flips up. I’m not 100% sure if it serves any other purpose, and particularly, I’m not sure if it serves a light-sealing purpose. If you’re doing a light seal replacement, it might make sense to do this one at the same time because the method is apparently very similar. I’m also wondering if this is maybe related to my autoexposure issues – I could imagine my autoexposure being 4 stops too dark being caused by a deteriorated piece of foam allowing excess light light to get into the sensor at certain angles. ↩︎
Y’know, those things that are under no circumstances supposed to be put in your ears but everyone does it anyway. I think they’re called Q-tips or ‘cotton swabs’ in the US. I called them ‘cotton buds’ growing up. ↩︎
Wait, do you really need to wait for 10 or 15 minutes for your eyes to adjust? Well, it depends on how much you care. If you’re going to leave your camera sitting in direct sunlight between shots, then probably – otherwise probably not. Apparently it takes on average 30-45 minutes for the rod cells in your eyeballs to fully adapt for night vision so if you wanted to be a real purist about it, then you should probably wait for that long, I guess. I got bored after five minutes, so I gave up after ten. ↩︎